This post will be a walk-through of all the steps required to create an application using Gluon Mobile that could be deployed on desktop and mobile platforms like Android or iOS.
Prerequisites
Before getting any further, please check that you have installed these prerequisites:
- JavaFXPorts: Check Getting Started and check the list of prerequisites for the use of the Gradle jfxmobile-plugin.
- Gluon Plugin for NetBeans or IntelliJ IDEA.
- Gluon Mobile Developer Preview 2. It is not required but you can already buy a license.
- Gluon Scene Builder.
Also, it’s recommended to read the documentation to get a grasp of Gluon Mobile.
Getting Started
You can fork or clone the repository here. Once you have the repository, you can try to clean and build it and check that everything works. Otherwise, please review the prerequisite list.
Or you can follow the next steps, and create the project from the scratch. Otherwise, just skip the next paragraphs.
Creating the Project
We are going to use NetBeans for the following steps, but the same could be done with the Gluon Plugin for IntelliJ IDEA.
1. Create a new Project on NetBeans with Gluon Plugin
Use Comments as the project name, select your folder, and as a package name use com.gluonhq.demo.comments. The main class will be CommentsFX.
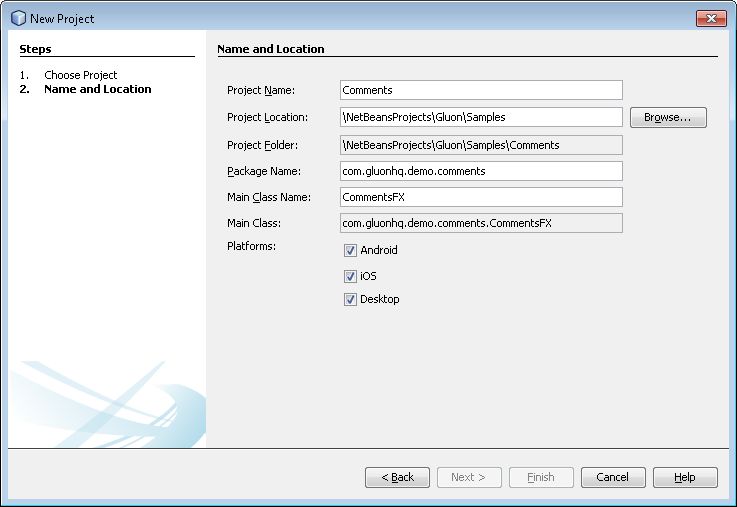
New Project
2. Update build.gradle file
The plugin version is, at the time of this writing, b10:
dependencies {
  classpath 'org.javafxports:jfxmobile-plugin:1.0.0-b10'
}
We can include the Gluon Mobile dependencies. Also we’ll use Afterburner.fx framework from Adam Bien which provides a very simple MVP framework that allows for injection. We contributed some code to make it mobile-enabled, and that version is now called Afterburner.mfx
repositories {
  jcenter()
  maven {
    url 'http://nexus.gluonhq.com/nexus/content/repositories/releases/'
  }
}

mainClassName = 'com.gluonhq.demo.comments.CommentsFX'
ext.GLUON_VERSION = "0.0.2"

dependencies {
    compile 'com.airhacks:afterburner.mfx:1.6.2'

    compile "com.gluonhq:charm:$GLUON_VERSION"
    androidRuntime "com.gluonhq:charm-android:$GLUON_VERSION"
    iosRuntime "com.gluonhq:charm-ios:$GLUON_VERSION"
    desktopRuntime "com.gluonhq:charm-desktop:$GLUON_VERSION"
}
Save and compile the project. Dependencies will be downloaded the first time this is run, so please be patient. If you right-click on the projects root and select ‘Reload Project’, the dependencies will show up under the ‘Dependencies’ folder of the project.
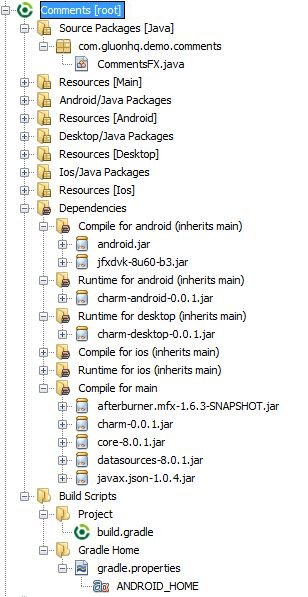
Project folders
3. Introduce MobileApplication
Have a look at the documentation for MobileApplication. For Gluon Mobile, the MobileApplication class should be considered as the base class, in a similar fashion to the Application class is to JavaFX applications.
In fact, MobileApplication extends from Application, and our class will extend it, so there is no need for a start method. We’ll add View instances on its constructor or overriding the init method. There is also a new postInit method that can be used for one time initialization, since it’s called once there is a valid scene instance.
@License(key="XXXXXXXX-XXXX-XXXX-XXXX-XXXXXXXXXXXX")
public class CommentsFX extends MobileApplication {

    @Override
    public void init() {

    }

    @Override
    public void postInit(Scene scene){

    }
}
Even without a single line of code in our Presenter, we can build the project and run it to check how it goes:
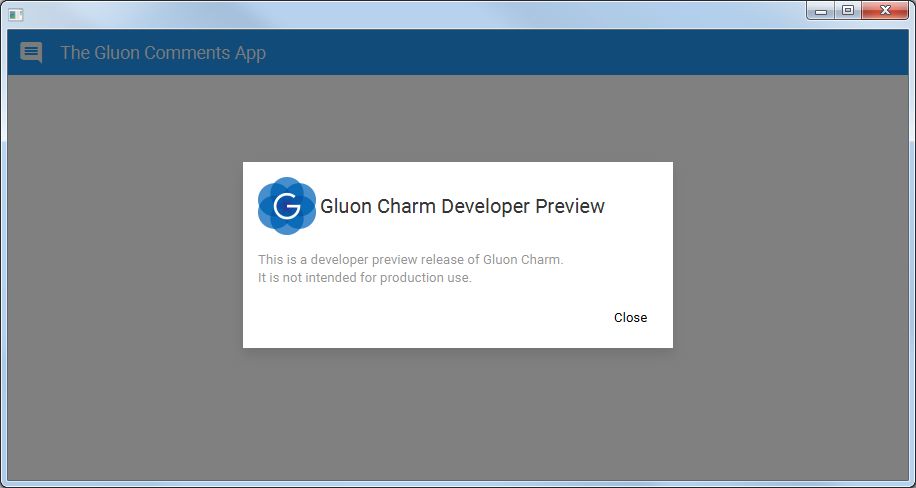
First run
If you have a valid license key for Gluon Mobile, add it to your application with the @License annotation, and you will avoid the initial nag screen.
We will install an indigo Swatch for this app. Also we can define the size of the scene for the deskop version, using JavaFXPlatfrom.isDektop() from Charm Down.
    @Override
    public void postInit(Scene scene){
        Swatch.INDIGO.assignTo(scene);

        if(JavaFXPlatform.isDesktop()){
            scene.getWindow().setWidth(400);
            scene.getWindow().setHeight(600);
        }
    }
}
4. Create the Home View
Since we are using the Afterburner framework, all we need to do is create the com.gluonhq.demo.comments.views.home package and add the following files two classes: HomeView and HomePresenter. Additionally, in the src/main/resources directory create the same package and then create home.fxml and home.css files.
We can create our home view with Scene Builder. Since we are using View as our layout pane, we should add Charm jar to Scene Builder first. For that, find charm-0.0.2.jar location under Dependencies, Compile for main, right click on it, select Properties and copy the path shown on All Files. On Scene Builder, Library, Import JAR/FXML File…, paste it, and import all the components.
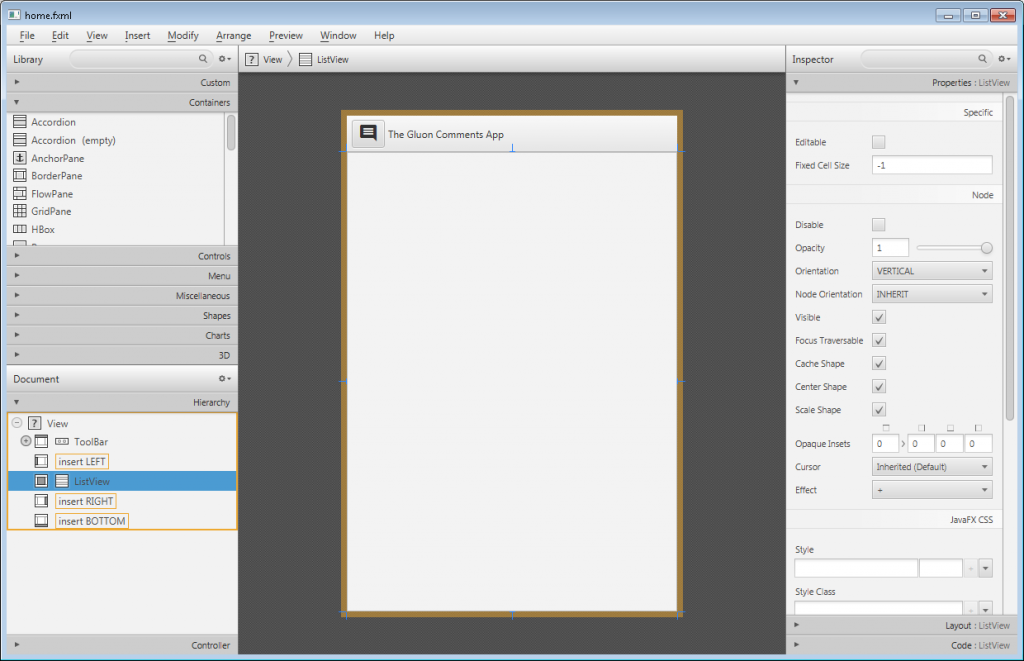
Select from Custom components View, and add a Toolbar on top and a ListView on the center. If you edit home.fxml you should see something like this:
For the button, we have added an Icon as the graphic. It allows selecting from MaterialDesignIcon list of icons, based on the Material Design style guide.
Now adding the view to the main class is as easy as using the addViewFactory method:
    @Override
    public void init() {
       addViewFactory(HOME_VIEW,()->{
            HomeView homeView = new HomeView();
            return (View)homeView.getView();
        });
    }
5. Add functionality to the Home View
For the ListView we’ll be using a Comments POJO, with just an author and a content String fields.
On the Presenter class, we’ll have via @FXML annotation the View and ListView references.
@FXML
private View homeView;

@FXML
private ListView<Comment> comments;

@Override
public void initialize(URL url, ResourceBundle rb) {

}
Again, we can build the project and run it to check how it goes for now on desktop:
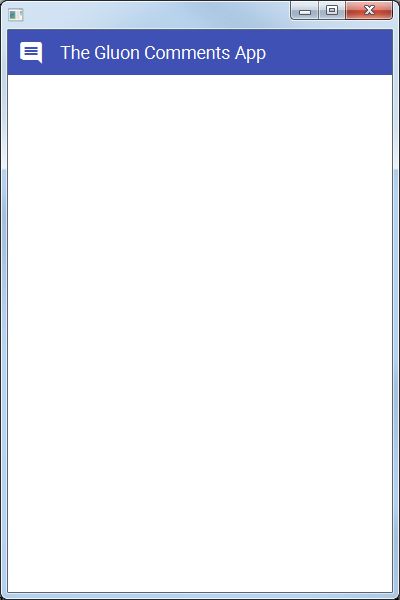
App on Desktop
Let’s go to the Gluon Cloud
This link contains detailed information for the following steps.
1. The Gluon Cloud Portal
Before you can start using the Gluon Mobile ‘Charm Connect’ library, you will need to register your application on the Gluon Cloud Portal. For now, the manual registration process is disabled, so once you have filled in the registration form, you will receive an email with the details on how to obtain the credentials for your application.
With your user account credentials, log in into the Gluon Cloud portal, and you will be able to see the dashboard with your applications and their key and secret tokens. As a word of advise, keep them safe and don’t send them to anyone.
2. The GluonClientProvider class
We can build now a new GluonClient, which is the access point to the Cloud service.
GluonClient gluonClient = GluonClientBuilder.create()
                    .host("http://cloud.gluonhq.com/1")
                    .credentials(new GluonCredentials(APPKEY, APPSECRET))
                    .build();
3. The CommentsSevice class
Once you have a GluonClient reference, you can obtain a StorageService from it:
StorageService storageService = gluonClient.getStorageService();
These service can be used to retrieve data from and store data to the Gluon Cloud service. In this case, the data will be a list with comments. The way we can get this list from this service is:
CharmObservableList<Comment> retrieveList = storageService.<Comment>retrieveList(CLOUD_LIST_ID,
                Comment.class, StorageWhere.GLUONCLOUD,
                SyncFlag.LIST_WRITE_THROUGH, SyncFlag.LIST_READ_THROUGH);
We’ll wrap this remote observable list into an ObjectProperty in order to expose it to the view and bind it with the ListView content.
4. Injecting the service
Back on our HomePresenter, we can inject a singleton instance of CommentsService by using the @Inject annotation, thanks to the Afterburner framework.
@Inject
private CommentsService service;

@Override
public void initialize(URL url, ResourceBundle rb) {
    ...
    service.retrieveComments();
    comments.itemsProperty().bind(service.commentsProperty());
}
5. A custom cell for the list
On CommentsListCell there’s a possible customization of a ListCell. We make use of ListTile control, so we can display two graphic nodes on the cell.
The main node will contain two labels wrapped in a VBox, one for the author, and one for the content. While on the right we’ll show a DELETE button, allowing comments deletion. This button can be styled with some CSS that’s loaded from home.css file by the framework. Also, a Dialog can be used to confirm the deletion.
Don’t forget to use this list cell implementation as the ListView cell factory.
Adding comments
To be able to add comments, we’ll add a second view to the application: the comments view
1. Adding comments package
As we did before, time to add com.gluonhq.demo.comments.views.comments package, and its classes CommentsView, CommentsPresenter, and resources comments.fxml and comments.css.
2. Designing the view
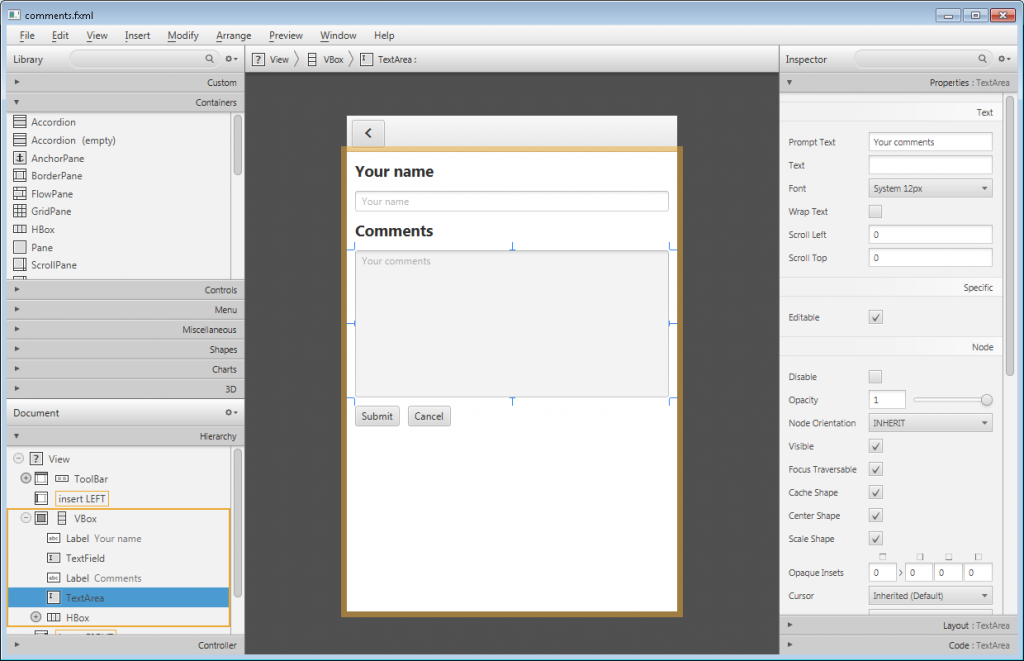
Edit the fxml file, add a View layout pane, and add a toolbar on top of it, and a VBox in the center, with a text field for the author name and a text area for the comment content.
Create a new view factory on the main class:
addViewFactory(COMMENTS_VIEW, ()->{
    CommentsView commentsView = new CommentsView();
    return (View)commentsView.getView();
});
3. Adding functionality
On the presenter, inject the service, and add a listener to disable the Submit button in case any of the fields are empty.
When a comment is inserted, and Submit is pressed, the comment has to be added to the list, by means of the service addComment method:
service.addComment(new Comment(authorField.getText(), commentsField.getText()));
Since the list content is bounded to the remote observable list, this comment will be inmediately send to the cloud, and from there it will be broadcasted to the rest of the clients.
For all the buttons, the way to go back to the main view is by switching it:
MobileApplication.getInstance().switchView(HOME_VIEW);
4. Accessing the comments view
In the same way, to access the comments view from the main home view we can use a FloatingActionButton, installed on the home presenter:
homeView.getLayers().add(new FloatingActionButton("Action", e -> {
    MobileApplication.getInstance().switchView(CommentsFX.COMMENTS_VIEW);
}));
Time for a test
If you have made it here, or if you just cloned the repository, it’s time to test the application running first on desktop, and if everything goes fine, try then on mobile.
- Running the app
- Adding a Comment
- The comment on the list
- Deleting a comment
And these are a few screenshots from mobile devices:
- App on Android
- Adding a comment on iOS
- App on iOS
Conclusions
Throughout this post we’ve covered in detail the basic steps to create a fully operative app for different platforms, with Cloud services and native UI controls, only using JavaFX and Gluon Mobile.
Time for you to test the code here, build it and deploy it on your favorite platform.

