Handling Android Native Activities like a Pro
 Due to popular request, we have enhanced the JavaFX Mobile SDK for Android with the ability to communicate between your JavaFX Application and other applications running on the device.
Android developers are familiar with the concepts of Intents and Activities, and with the ability to transfer control from your application to another application in order to achieve a result from this application.
In order to enable this functionality in JavaFX, we added a function on javafxports.android.Activity: Activity.setOnActivityResultHander (IntentHandler handler);
An example of this functionality is available in the Gluon samples repository, and this functionality is available in the Gluon JavaFX Mobile SDK for Android that we released earlier this week.
In the sections below we will briefly describe how this works, and how you can extend your JavaFX codebase with some native implementation, in case Charm Down doesn’t provide it yet.
Getting started
Create a project using the Gluon Plugin on your favorite IDE. Notice you will have an Android package, where you can place Android native code.
Defining the service
Let’s define an interface with the methods we want to execute in the running platform. For the sake of simplicity, we’ll focus on a photo gallery sample: we want to take a picture with the device’s camera or we want to retrieve an image from the device’s gallery. Either way, we’ll have a javafx.scene.image.Image as a result, bundled in an observable property.
public interface NativeService { void takePicture(); void retrievePicture(); ObjectProperty getImage(); }
We are working on an implementation on iOS. Once this is ready, this functionality can be added to Charm Down, and developers don’t have to write boilerplate code for platform-specific functionality. For now, the platform-detection is done in the sample below.
In order to call that Android native code from the JavaFX code in the main package, we create an abstract class with an abstract method returning the native interface. We will subclass it in the specific platforms, providing native implementations of the service, as well.
public abstract class GoNativePlatform { public abstract NativeService getNativeService(); }
Once we know the platform we are running on, we can load at runtime the specific subclass:
public class GoNativePlatformFactory {
public static GoNativePlatform getPlatform() {
    try {
        return (GoNativePlatform) Class.forName(getPlatformClassName()).newInstance();
    } catch (Throwable ex) {
        Logger.getLogger(GoNativePlatformFactory.class.getName()).log(Level.SEVERE, null, ex);
        return null;
    }
}

private static String getPlatformClassName() {
    switch ( System.getProperty("javafx.platform", "desktop") ) {
        case "android": return "com.gluonhq.demo.gonative.AndroidPlatform";
        case "ios": return "com.gluonhq.demo.gonative.IosPlatform";
        default : return "com.gluonhq.demo.gonative.DesktopPlatform";
    }
}
}
Finally, in our JavaFX application class we can create a platform-agnostic instance of the service, that will run only on the specific platform:
public class GoNativeFX extends MobileApplication {
@Override public void init() {
    final NativeService nativeService = GoNativePlatformFactory.getPlatform().getNativeService();
}
}
In case we are running on Android, this will be the subclass called when getPlatform() is invoked:
public class AndroidPlatform extends GoNativePlatform {
private AndroidNativeService nativeService;

@Override public NativeService getNativeService() {
    if (nativeService == null) {
        nativeService = new AndroidNativeService();
    }
    return nativeService;
}
}
The service
Time to define the service on Android:
public class AndroidNativeService implements NativeService {
@Override public void takePicture() {
}

@Override public void retrievePicture() {
}

@Override public ObjectProperty getImage() {
    return new SimpleObjectProperty<>();
}
And finally, time to get dirty going down into native Android code, fulfilling the required services.
Let’s focus on taking a picture with the camera.
Launching the activity
Usually, we create an Intent, and launch it from our JavaFX activity:
private static final int TAKE_PICTURE = 2;
@Override public void takePicture() { // create Intent Intent intent = new Intent(MediaStore.ACTION_IMAGE_CAPTURE);
// launch Activity
FXActivity.getInstance().startActivityForResult(intent, TAKE\_PICTURE);
}
This activity will launch the camera on the device, outside the JavaFX thread and outside our application.
Waiting for the activity to finish
With the new implementation provided in the JavaFX Mobile SDK for Android, we are able to wait until the launched activity finishes, process the result, and go back to our app and JavaFX thread. So we have to add the result handler before launching the activity:
private static final int TAKE_PICTURE = 2;
private final ObjectProperty fxImage = new SimpleObjectProperty<>();
@Override public void takePicture() { // create the Intent Intent intent = new Intent(MediaStore.ACTION_IMAGE_CAPTURE);
// provide Uri to store the picture, adding extra parameters to intent
File photo = new File(Environment.getExternalStorageDirectory(),  "Pic.jpg");
intent.putExtra(MediaStore.EXTRA\_OUTPUT, Uri.fromFile(photo));
final Uri imageUri = Uri.fromFile(photo);

// Add result handler
FXActivity.getInstance().setOnActivityResultHandler((requestCode, resultCode, data) -> {
    if (requestCode == TAKE\_PICTURE && resultCode == RESULT\_OK) {
        // retrieve picture from defined location
        String selectedImagePath = getPath(FXActivity.getInstance(), imageUri);
        Uri converted = Uri.fromFile(new File(selectedImagePath));

        // generate image and add it to property
        fxImage.set(new Image(converted.toString(), 300, 300, true, true));
    }
});

// launch activity
FXActivity.getInstance().startActivityForResult(intent, TAKE\_PICTURE);
}
Getting the image
Now, in our main application, we can simply listen to changes in fxImage, and load the new image inside an ImageView.
final ImageView imageView = new ImageView(); nativeService.getImage().addListener((obs, oldImage, newImage) -> imageView.setImage(newImage));
final Button buttonCamera = new Button(“Take a Picture”, MaterialDesignIcon.CAMERA.graphic()); buttonCamera.setOnAction(e -> nativeService.takePicture());
As a result, we can take a picture with our android device’s camera, and load it in our application. This is shown in the screenshots below:
#gallery-14 { margin: auto; } #gallery-14 .gallery-item { float: left; margin-top: 10px; text-align: center; width: 25%; } #gallery-14 img { border: 2px solid #cfcfcf; } #gallery-14 .gallery-caption { margin-left: 0; } /* see gallery_shortcode() in wp-includes/media.php */
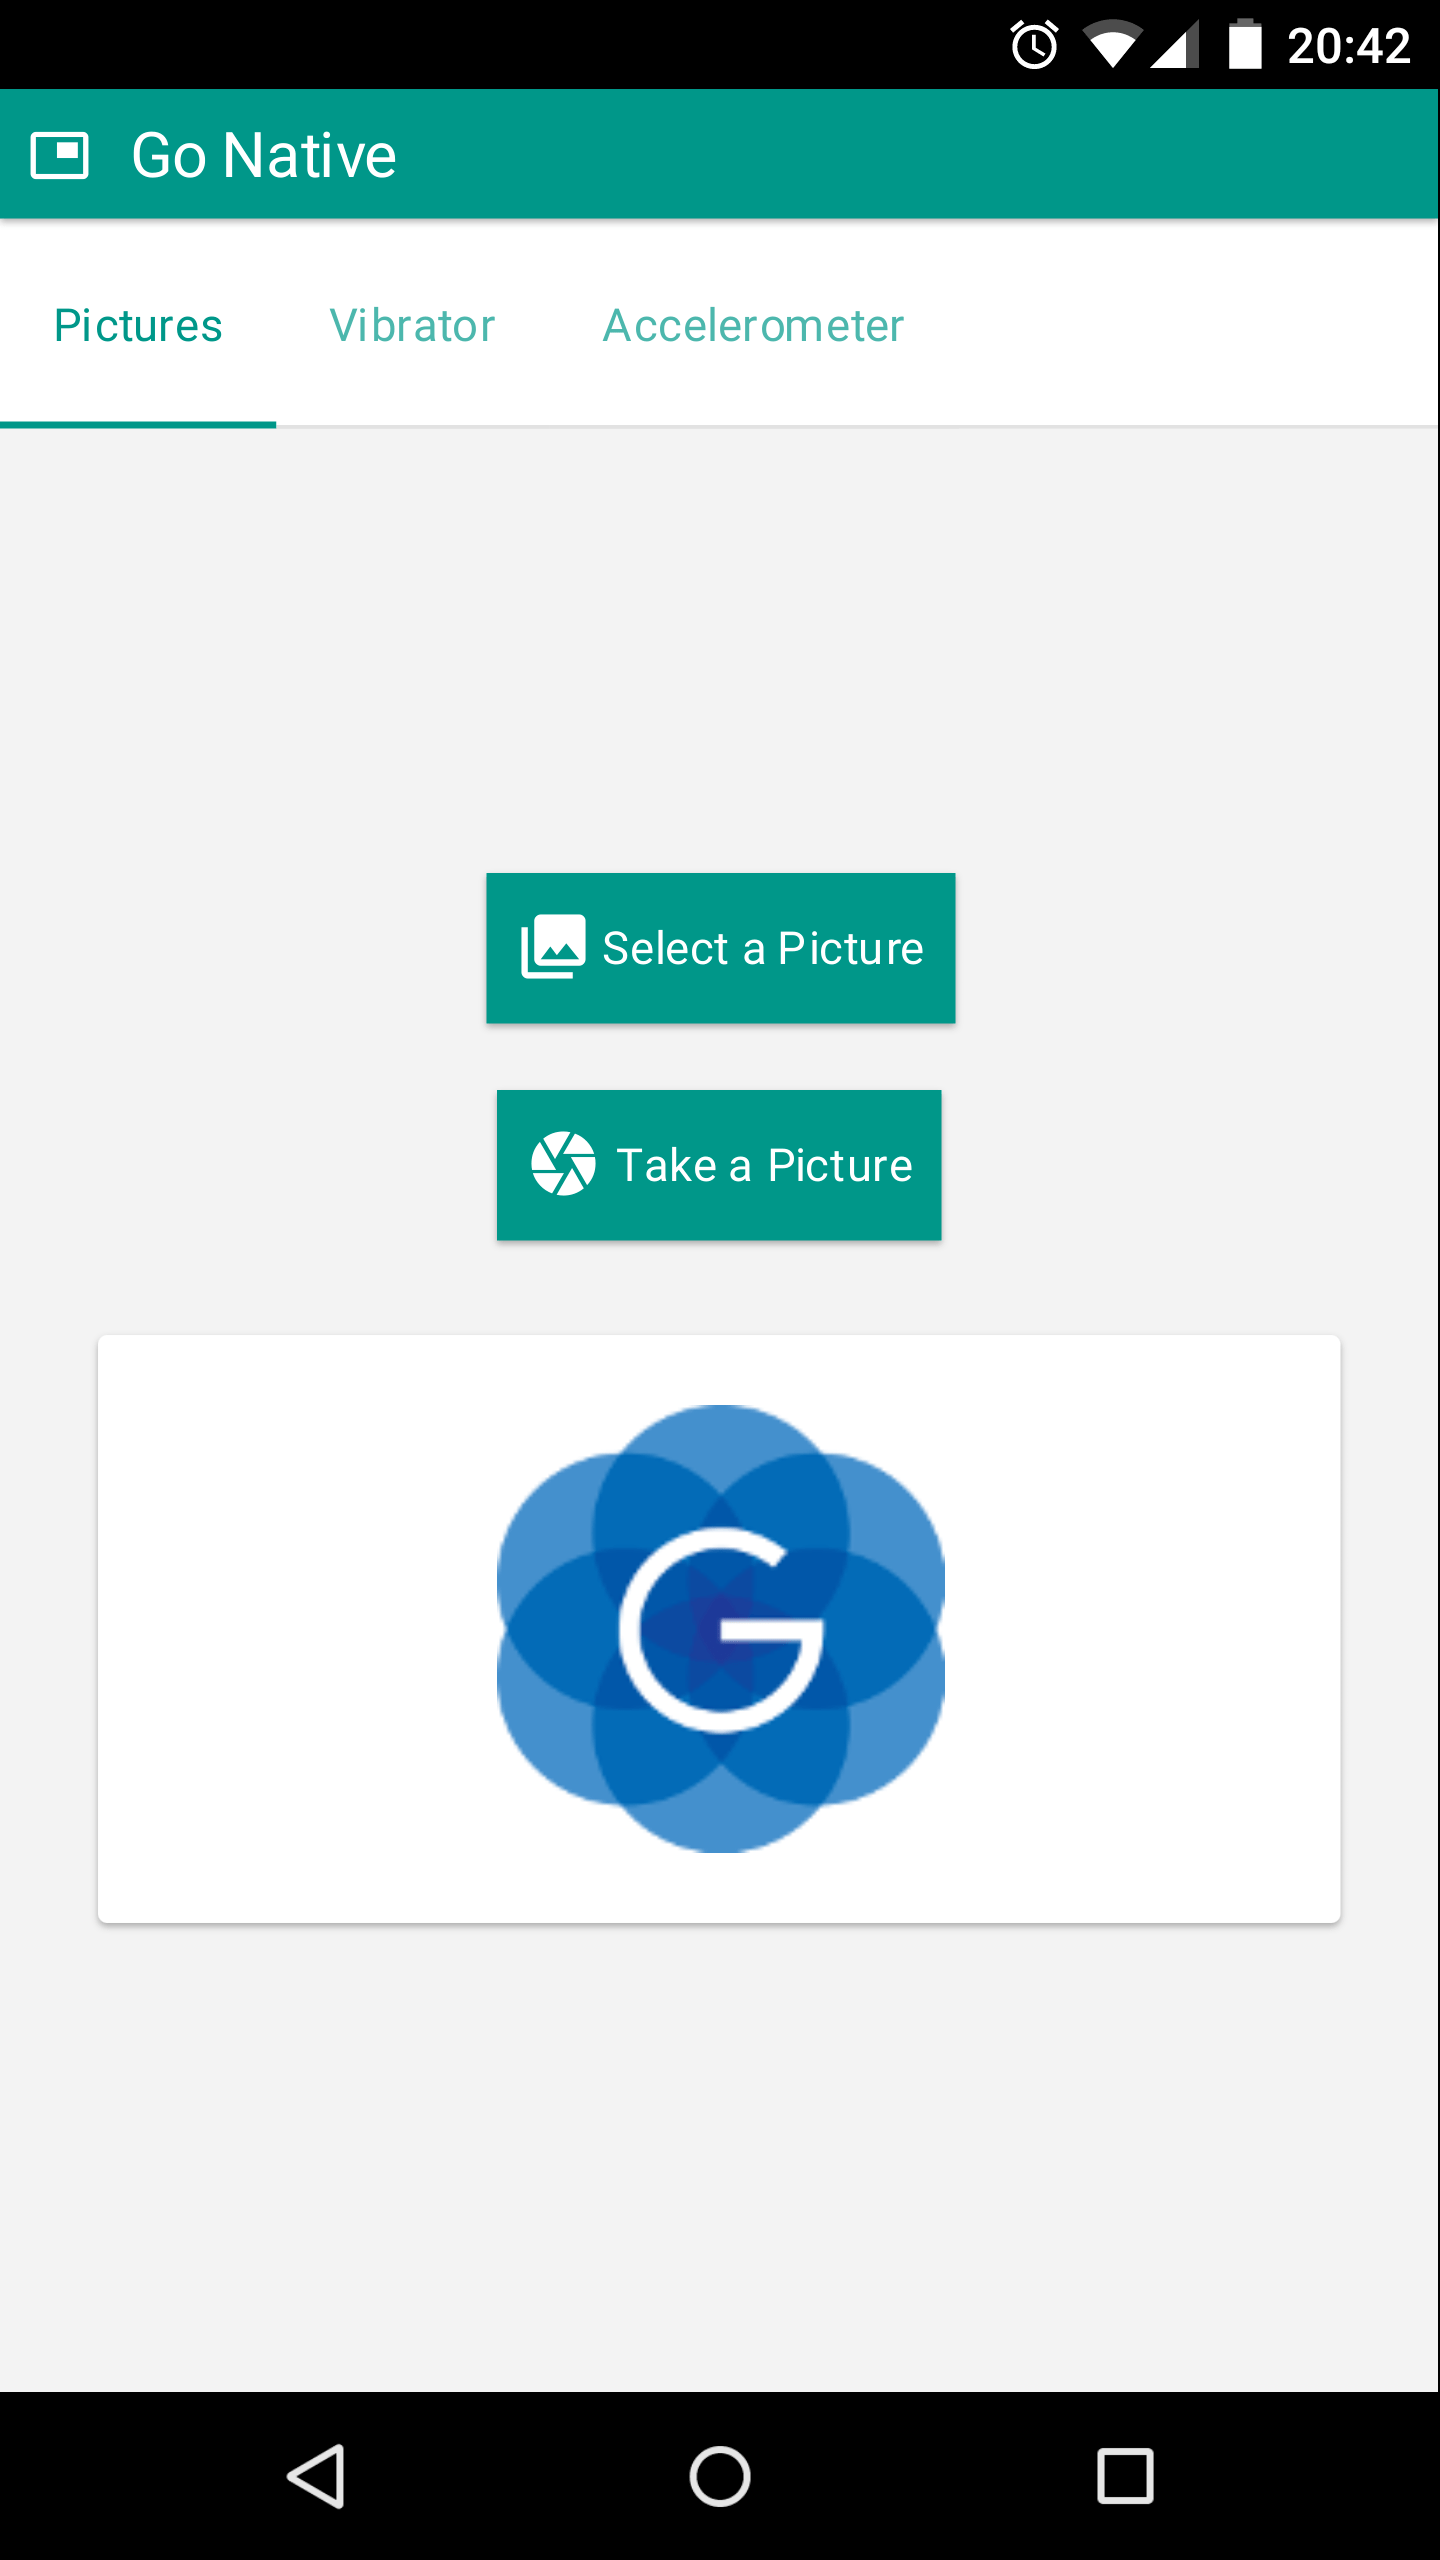
Launch the application
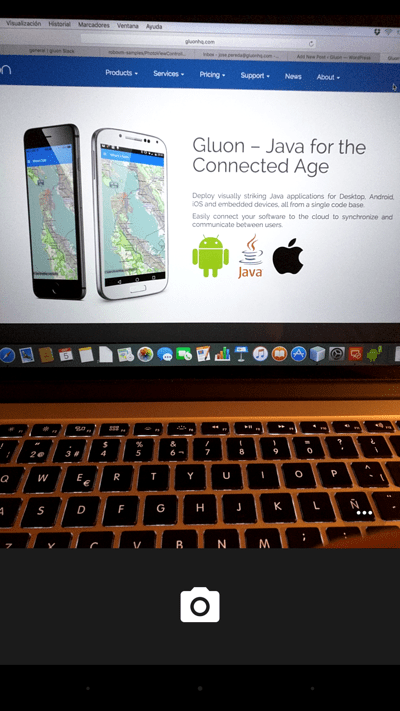
The camera opens
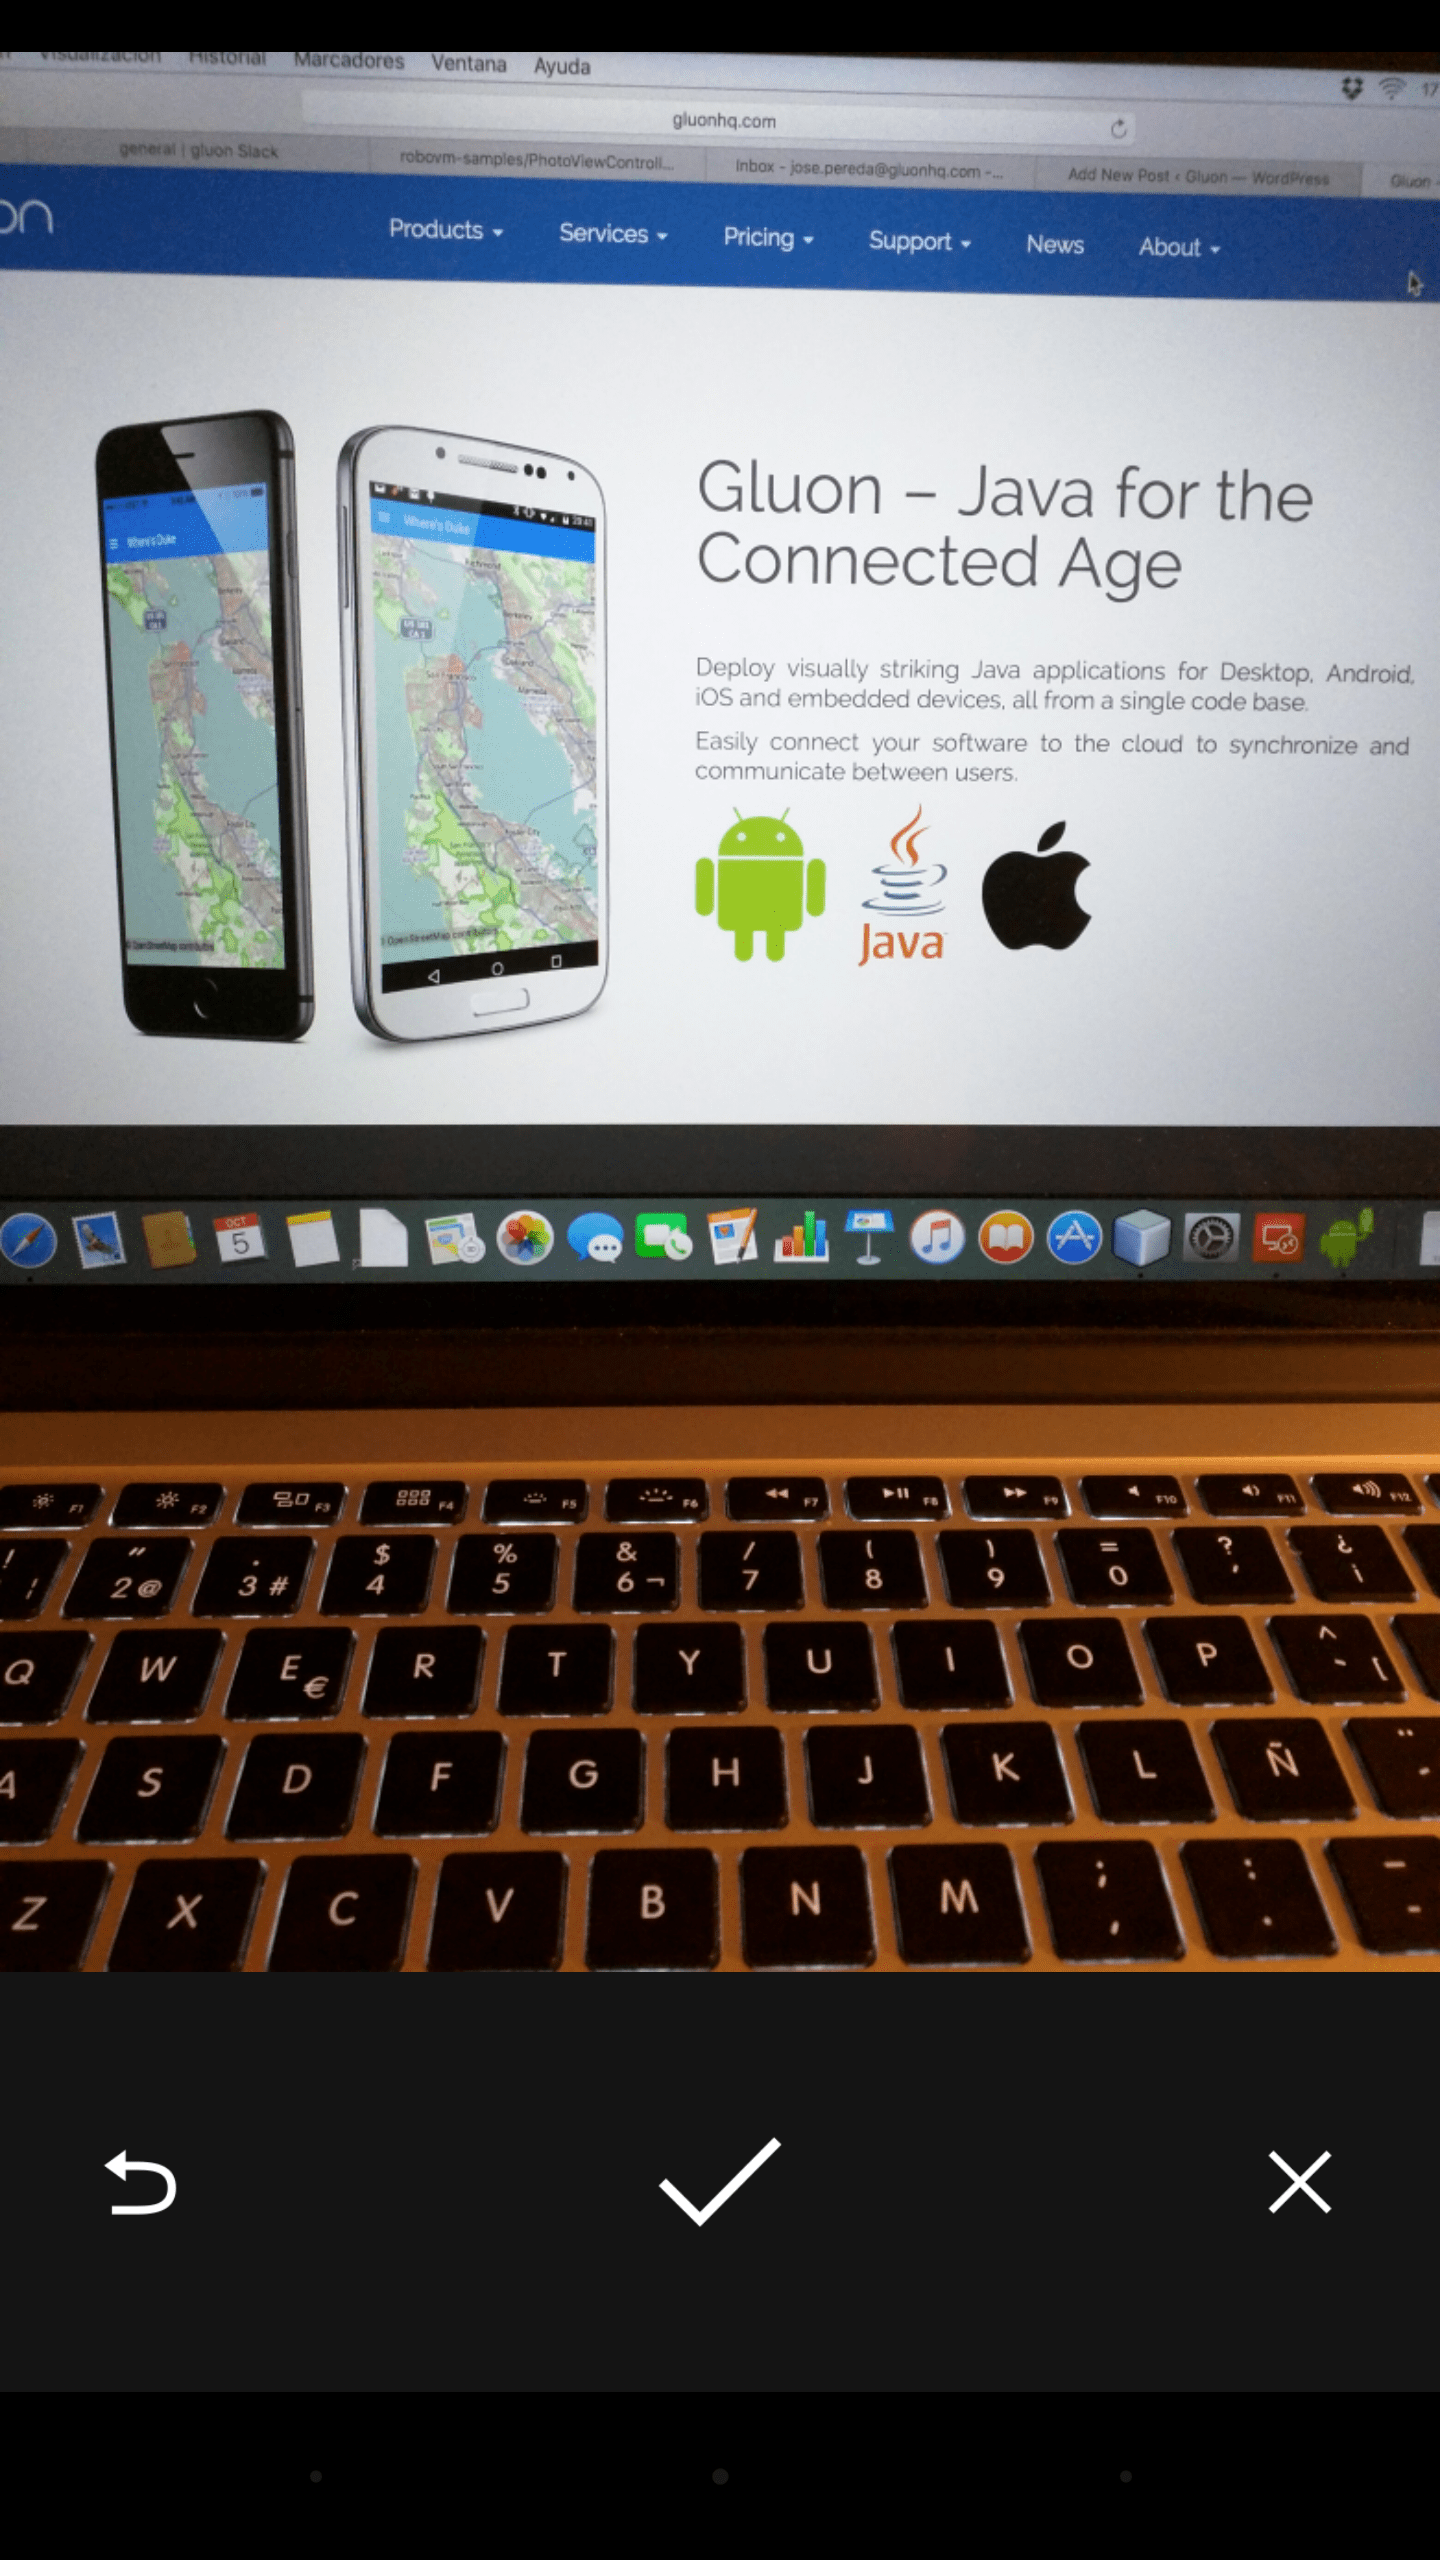
You take the picture
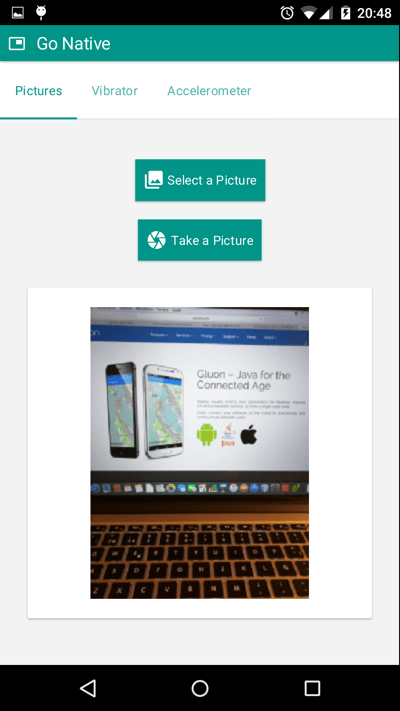
And it is included in the app
Summary
We have seen in detail how to add Android native code in our application, in order to make use of one of the many native services we can find on our devices.
Check all the code in the repository to find out about the rest of the services included in GoNative. And check also Charm Down for an platform-agnostic API already available for several services like local storage or GPS.
We look forward to what you can achieve with this new functionality, and we hope to see your contributions to Charm Down to support new functionality!