
 As we published a few days ago, the new Charm Developer Preview release includes a new control intended to create more mobile-friendly user interfaces. This control is called CharmListView, the enhanced Gluon version of the standard JavaFX ListView control. It is demonstrated in 50 States, a new application that makes use of this control, being released as a free sample for developers wanting to get started quickly with Gluon Mobile concepts.
Before getting started, in case you didn’t know about Gluon Mobile or you haven’t tested it yet, learn more about it here.
The CharmListView control
CharmListView, a new control in Gluon Mobile, is an enhanced ListView control. While it displays a vertical list of items in the same fashion as the JavaFX UI control, it also allows for items to be created as headers. This is achieved at runtime through the use of a header generating function provided by the developer. By default, the header for the top-most visible item is displayed floating on top of the list, and it is replaced with the next one when the list is scrolled with a slide out effect.
For more details on the CharmListView API, refer to the Gluon Mobile JavaDocs.
Without further ado, let’s get a dive into the application.
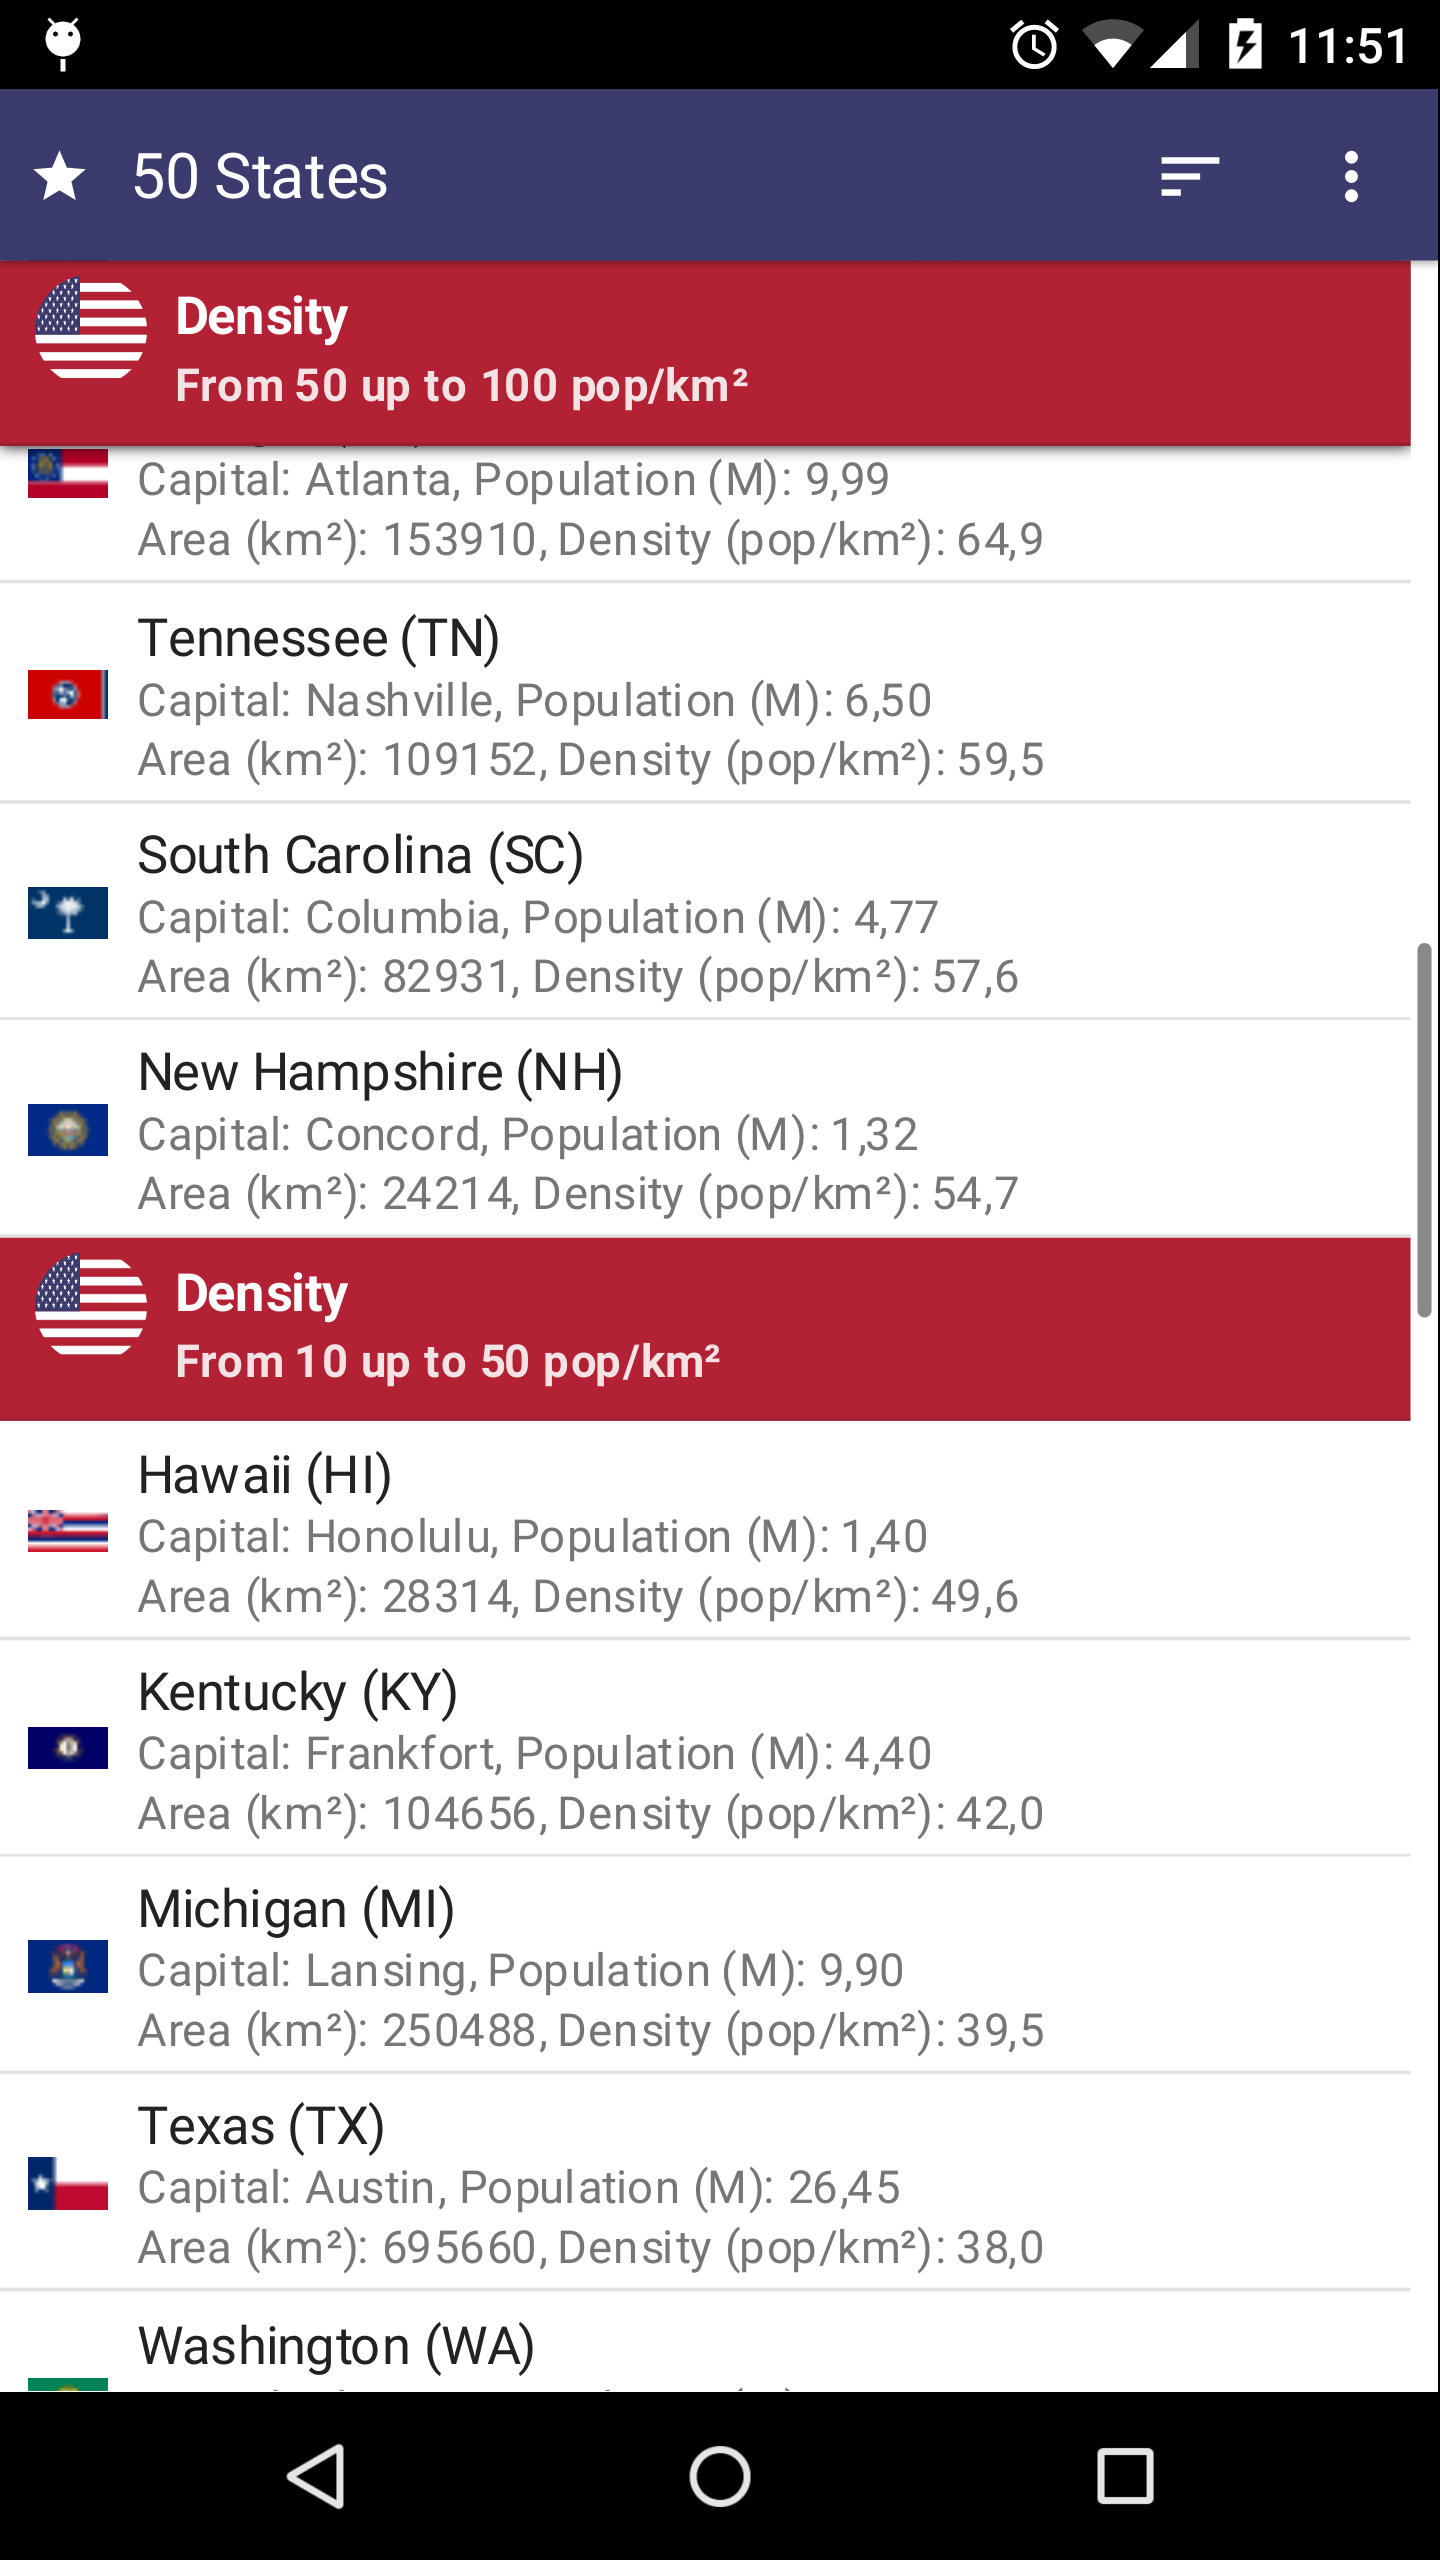
50 States. The app
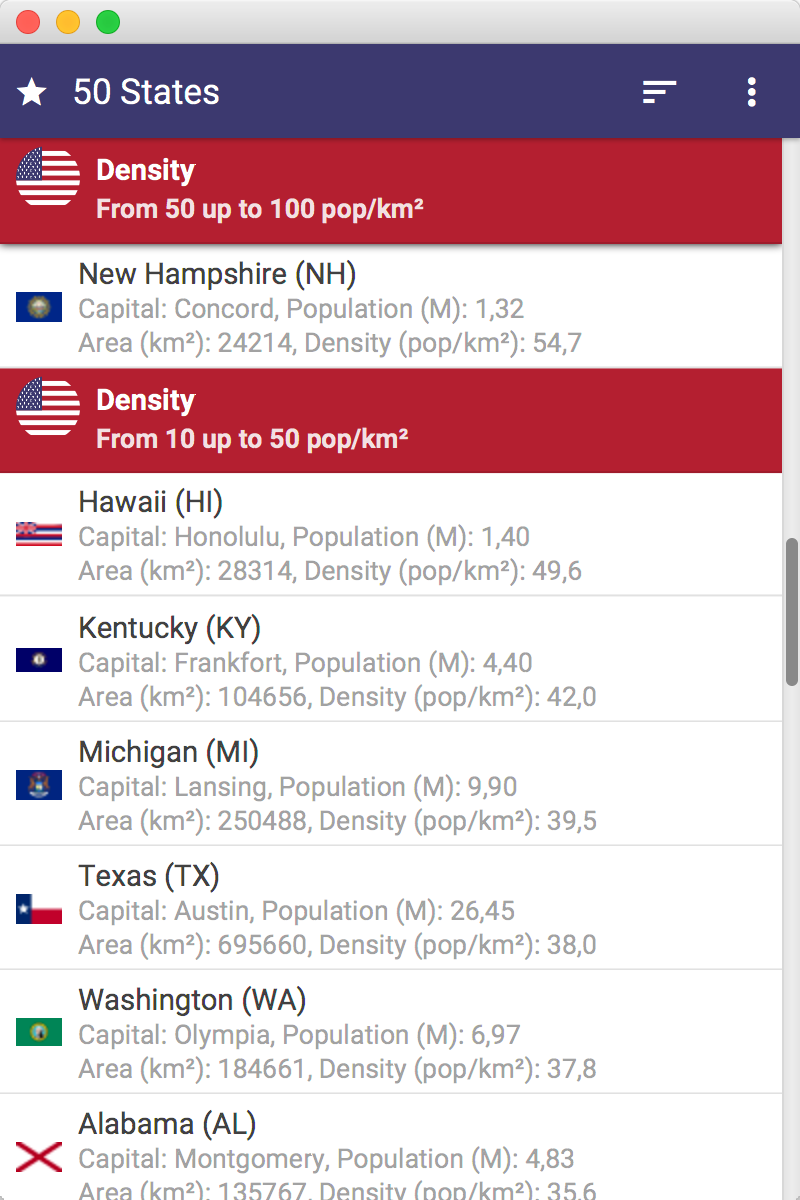
This screenshot shows the final application, so if you are interested in knowing how to use the control and how to develop fancy applications with Gluon Mobile, please keep reading.
App Preview
As usual, this is the list of prerequisites before starting with any Gluon project. Skip them if you have gone through the list at least once.
Prerequisites
Before getting any further, please check that you have installed these prerequisites:
- JavaFXPorts: Check Getting Started and check the list of prerequisites for the use of the Gradle jfxmobile-plugin.
- Gluon Plugin for NetBeans, IntelliJ IDEA or Eclipse.
- Gluon Gluon Mobile Developer Preview 3. You can already buy a license or try it for free.
Also, it’s recommended to read the documentation to get a grasp of Gluon Mobile.
Getting Started
You can fork or clone the repository here. Once you have the repository, you can try to clean and build it and check that everything works. Otherwise, please review the prerequisite list.
If you create the project from the scratch, using Gluon Plugin on your favorite IDE (check the documentation in case you need some guidance), open the build.gradle file and following the ‘using Charm’ instructions, include Charm dependencies:
repositories {
  jcenter()
  maven {
    url 'http://nexus.gluonhq.com/nexus/content/repositories/releases/'
  }
}

ext.GLUON_VERSION = "0.0.3"

dependencies {
    compile "com.gluonhq:charm:$GLUON_VERSION"
    androidRuntime "com.gluonhq:charm-android:$GLUON_VERSION"
    iosRuntime "com.gluonhq:charm-ios:$GLUON_VERSION"
    desktopRuntime "com.gluonhq:charm-desktop:$GLUON_VERSION"
}
If you clean and build the project, the dependencies will be downloaded the first time. You may need to reload the project after that.
On your main class, introduce MobileApplication and add init() and postInit() empty methods.
The model
To illustrate the possibilities of the new control, we are going to use some basic data from the US States, retreived from here.
With a POJO like this:
public class USState {

    private String name;
    private String abbr;
    private String capital;
    private int population;
    private int area;
    private String flag;

    public USState(String name, String abbr, String capital, int population, int area, String flag) {
        this.name = name;
        this.abbr = abbr;
        this.capital = capital;
        this.population = population;
        this.area = area;
        this.flag = flag;
    }
    // setters and getters
}
we can have a static list with our model:
public static ObservableList statesList = FXCollections.observableArrayList(
    new USState("Alabama", "AL", "Montgomery", 4833722, 135767, "https://upload.wikimedia.org/wikipedia/commons/thumb/5/5c/Flag_of_Alabama.svg/23px-Flag_of_Alabama.svg.png"),
    ...
    new USState("Wyoming", "WY", "Cheyenne", 582658, 253335, "https://upload.wikimedia.org/wikipedia/commons/thumb/b/bc/Flag_of_Wyoming.svg/22px-Flag_of_Wyoming.svg.png")
);
Our objective will be classifying the States according to their population density. For that we’ll have this enum:
public class Density {

    public enum DENSITY {
        D000(0,10),
        D010(10,50),
        D050(50,100),
        D100(100,250),
        D250(250,500),
        D500(500,10000);

        final double ini;
        final double end;

        private DENSITY(double ini, double end){
            this.ini=ini;
            this.end=end;
        }

        public static DENSITY getDensity (double density){
            for(DENSITY d: DENSITY.values()){
                if(d.getIni() <= density && density < d.getEnd()){
                    return d;
                }
            }
            return DENSITY.D000;
        }
    }
}
Home View
We can add an initial View, and have our CharmListView control inserted:
@Override public void init() {
    addViewFactory(HOME_VIEW,() -> {
        View homeView = new View(HOME_VIEW) {
            {
                CharmListView<USState,DENSITY> charmListView = new CharmListView(USStates.statesList);
                setCenter(charmListView);
            }
        };
        return homeView;
    });
}
Since we haven’t provided any header function, for now it will behave like a regular ListView.
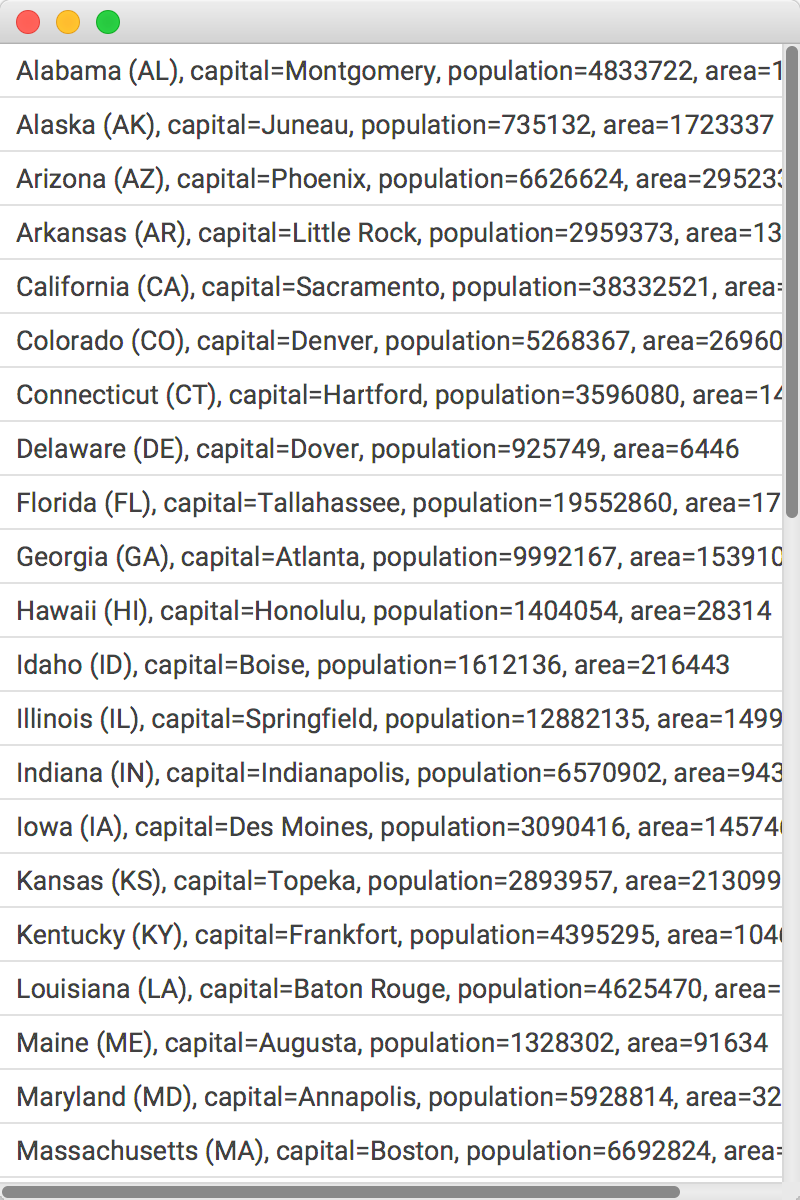
Control as ListView
Adding CharmListView
Let’s start by adding a cell factory to display the information on every State. For that we need to use CharmListCell, and override its updateItem method. To lay out the content, we’ll use ListTile, another Gluon Mobile control, designed for list cell graphics.
charmListView.setCellFactory(p -> new CharmListCell(){
    @Override public void updateItem(USState item, boolean empty) {
        super.updateItem(item, empty);

        if(item != null && !empty){
            ListTile tile = new ListTile();
            tile.textProperty().addAll(item.getName()+" ("+item.getAbbr()+")",
                    "Capital: "+item.getCapital()+", Population (M): "+String.format("%.2f",item.getPopulation()/1_000_000d),
                    "Area (km"+"\u00B2"+"): "+item.getArea()+
                        ", Density (pop/km"+"\u00B2"+"): "+String.format("%.1f",item.getDensity())
                    );
            final Image image = USStates.getImage(item.getFlag());
            if(image!=null){
                tile.setPrimaryGraphic(new ImageView(image));
            }
            setText(null);
            setGraphic(tile);
        } else {
            setText(null);
            setGraphic(null);
        }
    }
});
And now we’ll have a standard ListView with good looking cells:
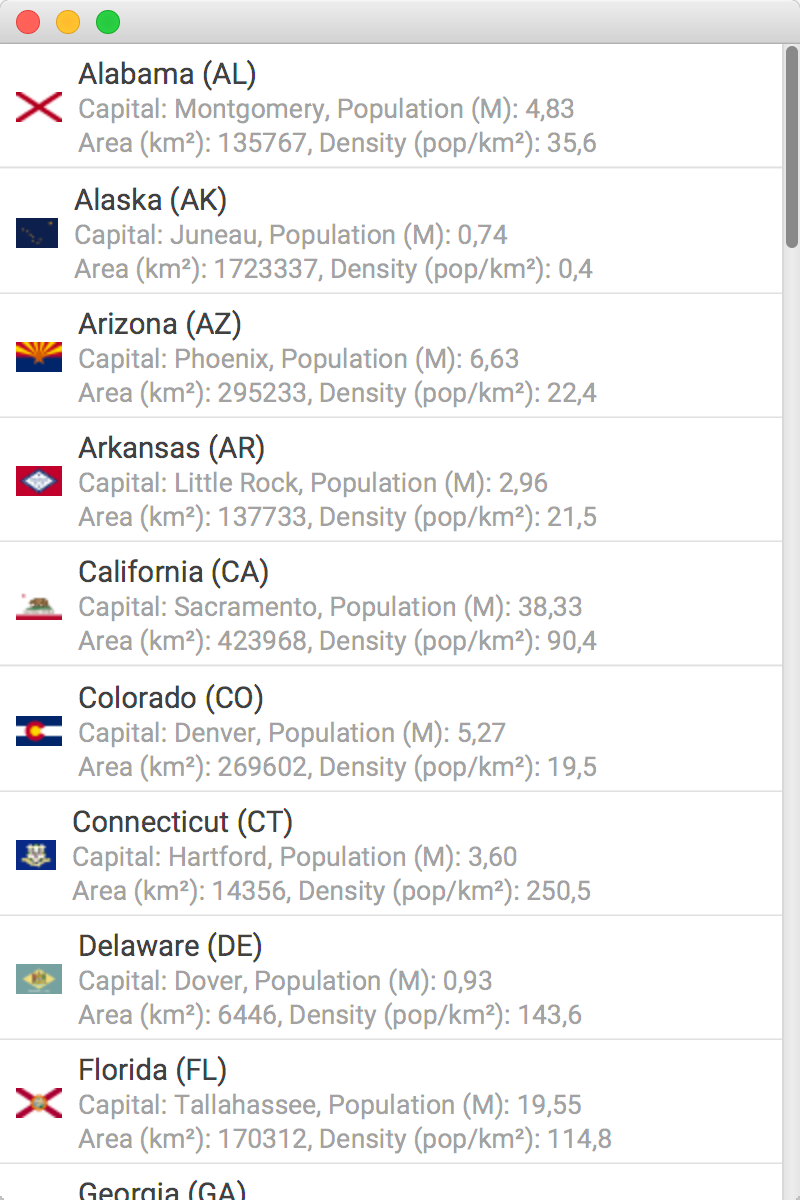
Formatting Standard Cells
Note we are adding the flag image for every State. We need a good caching strategy or the performance will be really bad, given that the images will be downloaded and recreated all over again on every call to updateItem.
Caching images
Thanks to Gluon Mobile Charm Down, we already have a CacheManager that takes care of that. It will retrieve the images for the first time, and then use them from memory. In case of low memory, it will remove some entries.
We create a static Cache instance, and then we manage the image retrieval from there:
public class USStates {

    private static final Cache<String, Image> cache;

    static {
        CacheManager cacheManager = PlatformFactory.getPlatform().getCacheManager();
        cache = cacheManager.<String, Image>createCache("images");
    }

    public static Image getImage (String image) {
        if(image==null || image.isEmpty()){
            return null;
        }
        Image cachedImage = cache.get(image);
        if (cachedImage == null) {
            cachedImage = new Image(image, true);
            cache.put(image, cachedImage);
        }
        return cachedImage;
    }
}
The header function
Time to add a header function and visualize some headers on our list.
For every US State, we can get the population density, and classify this State within the five categories created on the enum. This is how we specify the header function:
charmListView.setHeadersFunction(Density::getDensity);
And this is the result:
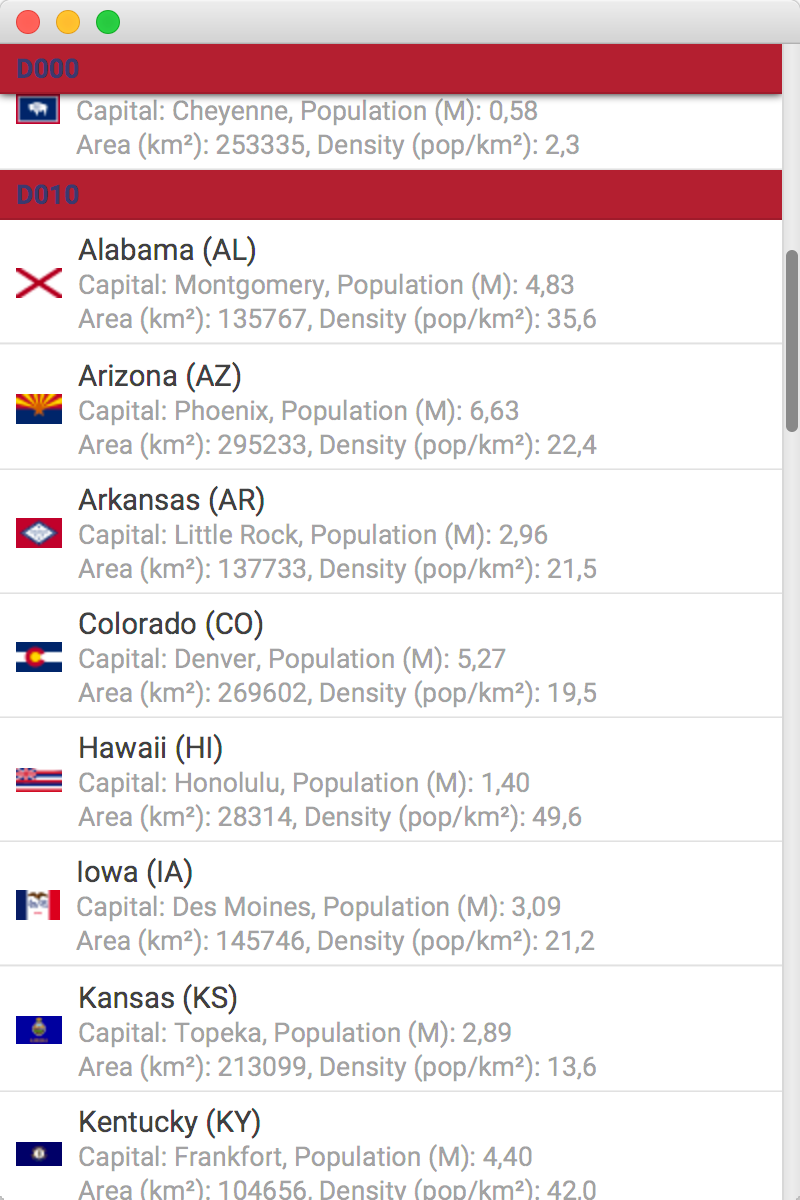
Adding Headers
By default, the name of the Enum is used on every header. Note also, that on top of the list there is a floating header for the first category visible.
Now we need a header cell factory to format properly the header.
charmListView.setHeaderCellFactory(p -> new CharmListCell(){
    @Override public void updateItem(USState item, boolean empty) {
        super.updateItem(item, empty);
        if(item != null && !empty){
            ListTile tile = new ListTile();
            tile.textProperty().addAll("Density",charmListView.toString(item));
            Avatar avatar = new Avatar(16);
            avatar.setImage(USStates.getUSFlag());
            tile.setPrimaryGraphic(avatar);
            setText(null);
            setGraphic(tile);
        } else {
            setText(null);
            setGraphic(null);
        }
    }
});

Formatting the headers
Instead of the enum name, we could get a proper formatting, by providing a StringConverter to the header:
charmListView.setConverter(new StringConverter() {
    @Override public String toString(DENSITY d) {
        return "From " + ((int)d.getIni())+" up to " + ((int)d.getEnd()) + " pop/km"+"\u00B2";
    }

    @Override public DENSITY fromString(String string) {
        throw new UnsupportedOperationException("Not supported yet.");
    }
});
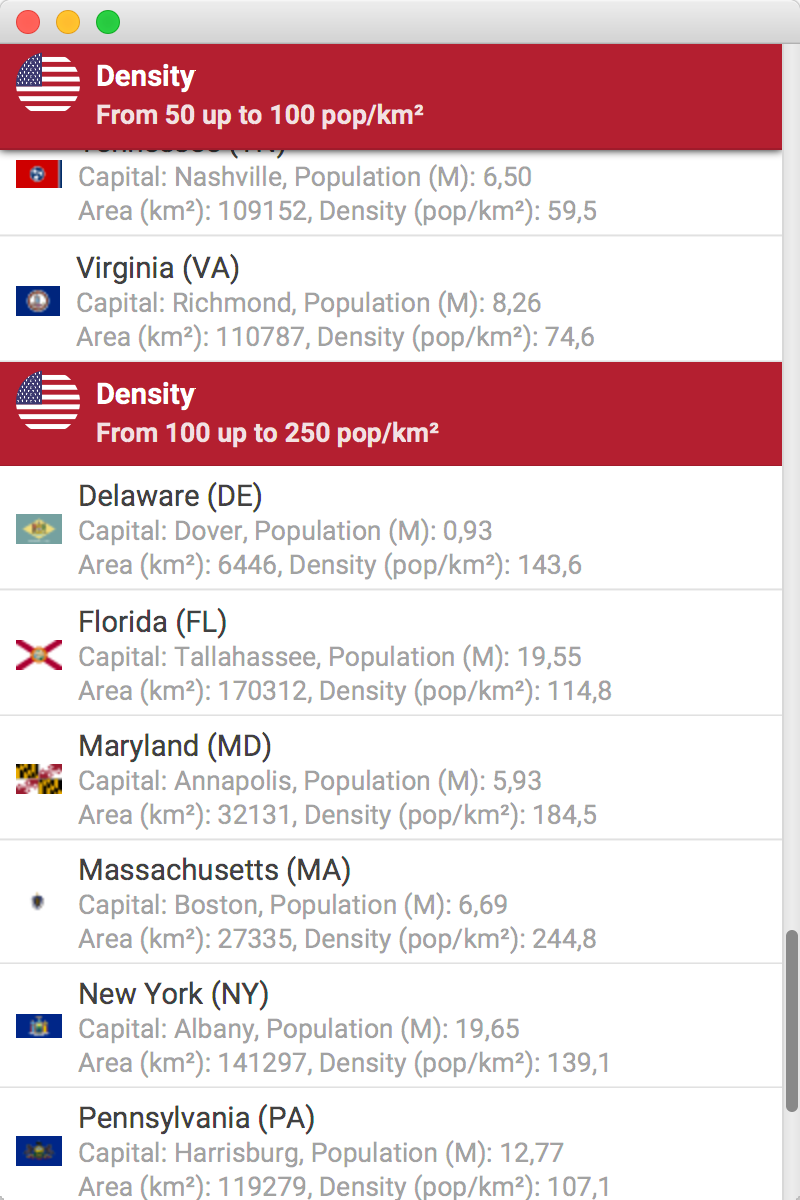
String Formatting
Sorting headers and cells
By default, the headers are sorted in natural order (alphabetically), while standard cells are unsorted, just as they were provided (in this case sorted alphabetically by the state name).
But we can add a Comparator to the headers to sort them based on a user-defined criteria. Similarly, we can specify a separate Comparator for the standard cells to sort these based on a different user-defined criteria. Let’s add a button to the view so we can change the order.
Button sort = MaterialDesignIcon.SORT.button(e -> {
    if(ascending){
        charmListView.setHeaderComparator((d1,d2) -> d1.compareTo(d2));
        charmListView.setComparator((s1,s2) -> Double.compare(s1.getDensity(), s2.getDensity()));
        ascending = false;
    } else {
        charmListView.setHeaderComparator((d1,d2) -> d2.compareTo(d1));
        charmListView.setComparator((s1,s2) -> Double.compare(s2.getDensity(), s1.getDensity()));
        ascending = true;
    }
});
This is the same control, with descending order:
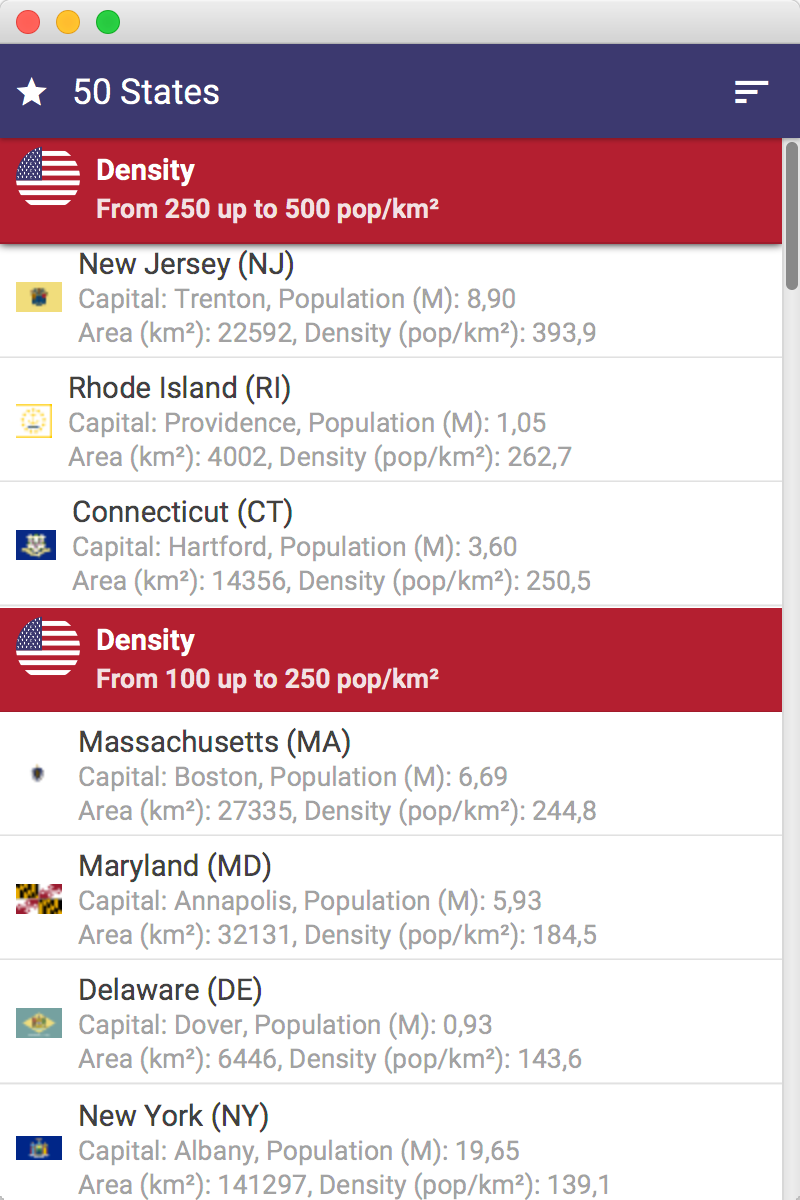
Sorting the list
Floating header
By default, the header for the most top visible cell is displayed floating on top of the list view, and it is replaced with the next one when the list is scrolled with a slide out effect.
This floating header can be hidden if required:
charmListView.setFloatingHeaderVisible(false);
Styling CharmListView
There are several style classes defined with default properties provided by Gluon Mobile. But those can be overridden to have a custom style.
This will be the default style:
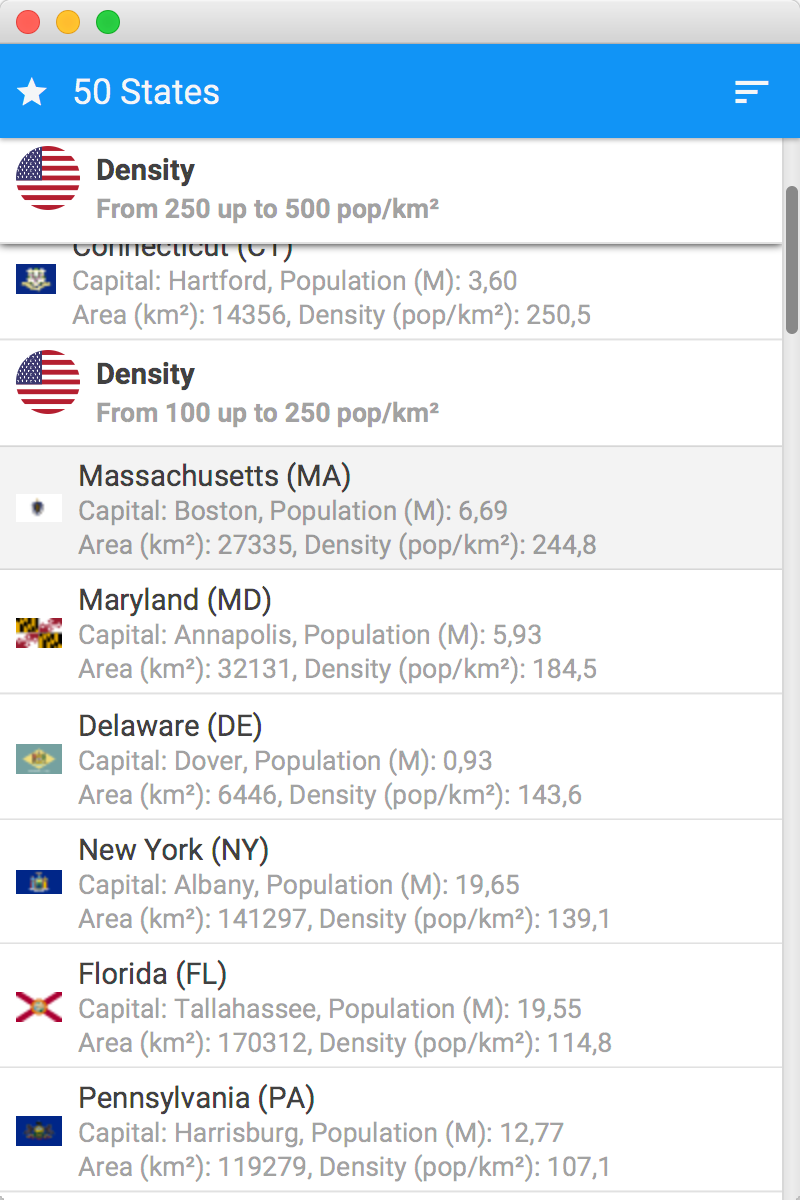
Default Style
And this the only css we have added for the 50 States sample application:
.root {
    /* https://en.wikipedia.org/wiki/Flag_of_the_United_States#Colors
    ToolBar: Old Glory Blue  */
    -primary-swatch-500: #3C3B6E;
}
.charm-list-view .list-cell.header-cell {
    /*  Headers: Old Glory Red */
    -fx-background-color: #B22234;
}
.charm-list-view .list-cell.header-cell > .list-tile > .text-box > .primary-text {
    /* Headers primary text */
    -fx-text-fill: white;
}
.charm-list-view .list-cell.header-cell > .list-tile > .text-box > .secondary-text {
    /* Headers secondary text */
    -fx-text-fill: #FFFFFFDE;
}
Filtering the list
Since the content is bundled in an ObservableList, a FilteredList can be added with a predicate to allow filtering the list under given conditions:
FilteredList filteredList = new FilteredList<>(USStates.statesList, state -> state.getPopulation() >= 1_000_000);
CharmListView<USState,DENSITY> charmListView = new CharmListView(filteredList);
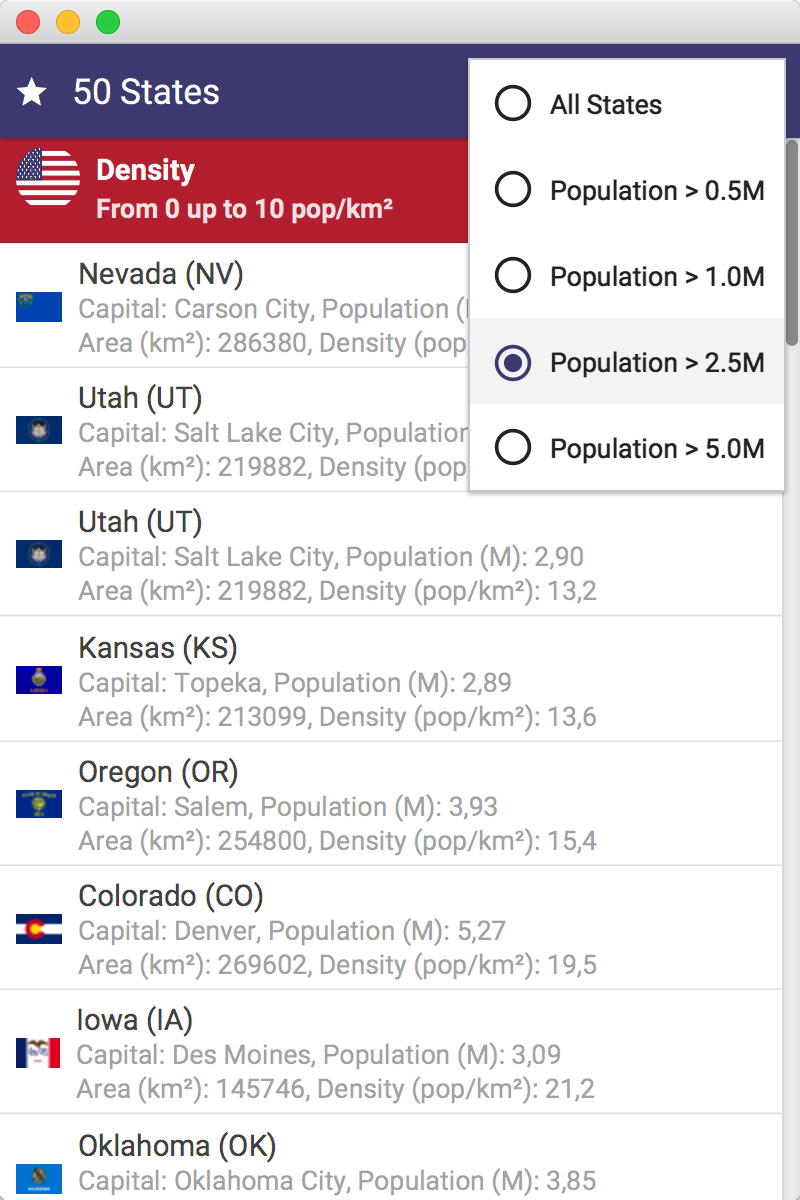
Filtering content
Final application
Clone the repo from here, in case you haven’t done it already, build the application for desktop or for your mobile, and run it. Once you have check all the steps we have covered on this post, try to modify the CharmListView control on your convenience.
50 States on mobile
Conclusions
Throughout this post we’ve covered in detail the basic steps to describe the CharmListView control, the new addition to the Gluon Mobile library.
We encourage you to start trying now the new Gluon Mobile components!